
Allow premail.pro so replies reach you
Premail applies your rules to every incoming message, including mail from Premail itself. If you asked for a reply to your feedback or a support request, a rule such as Cold Email or Marketing could archive or trash that reply before you see it. Adding premail.pro to your Allowed Senders takes about ten seconds and guarantees the reply lands in your inbox.
How do you add premail.pro to your allowed domains?
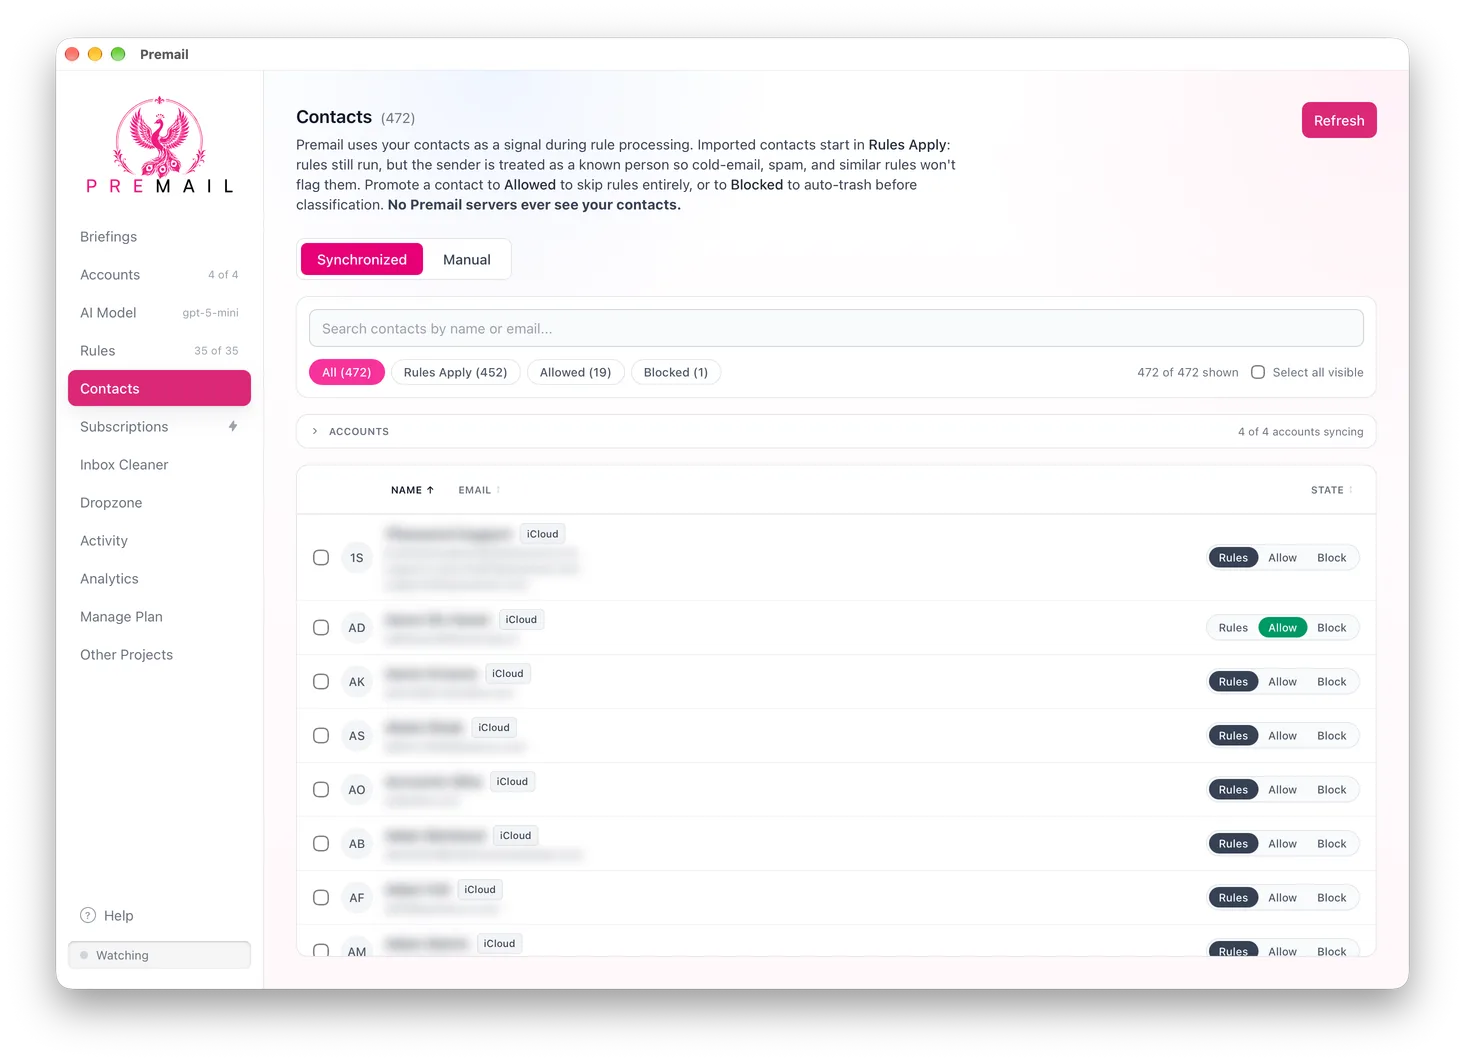
- 1Open Premail and click Contacts in the left sidebar.
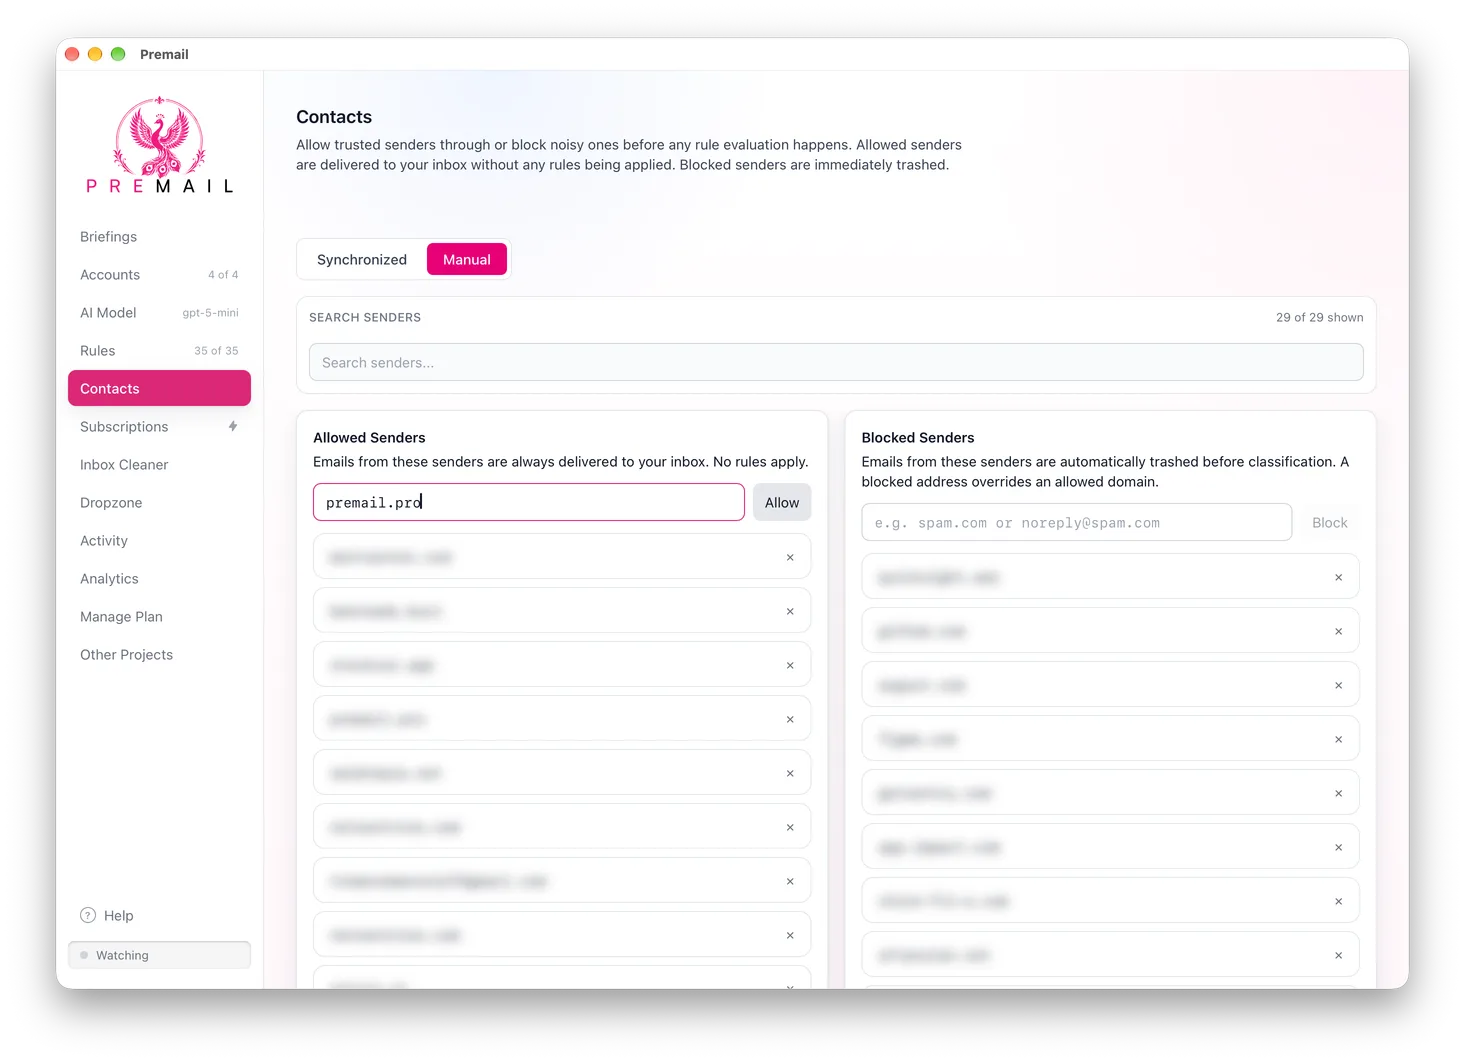
- 2Click the Manual tab, next to Synchronized, above the contact list.
- 3Under Allowed Senders, type
premail.proand click Allow.
What does allowing a domain do?
Mail from any address at an allowed domain is delivered to your inbox with no rules applied. It is not classified, so it never costs an AI call, and it is never archived, trashed, or moved by Premail. A blocked address still overrides an allowed domain.
Allowing premail.pro only affects mail from that domain. It does not sign you up for anything, and Premail still sends nothing unsolicited. See Send feedback to Premail for how replies work.
Still have questions?
Contact Support (for Pro members)